Fig. 3: A pretty three cylinder Kawasaki done in the cafe style.
Unfortunately, I was spending a lot of time on my parents rear patio looking at this:
Fig. 4: Rust, rock hard rubber, flat tires, corroded dresser bars, and half the parts. Also, a plastic bag, presumably to protect the engine...from itself.
The CB550 started off mostly complete. It had a beastly huge king and queen seat on it which contained an entire ecosystem. I trashed it, having not yet developed a taste for that sort of thing (I'm still not sure how I feel about them). I pulled the muffers off the pipes, which wasn't hard considering that rust had done half the job for me. The old battery was toast and I junked it too (but in hindsight I should have kept it for the discount places give you for trading in your old battery. Something to keep in mind for you builders-to-be out there).
I pulled the carburators after taking the tank off and putting it somewhere. I figured an engine and carb rebuild was in order. I like to get the functions in order before I start fiddling with style. I've heard of folks trying to salvage gaskets (shoot, I've done it myself) but for a nice, clean build, I like to go the full route and buy a gasket kit. It was easy enough to find one online using the model and year listed on the VIN plate (Note: Don't think you're going to get the right gaskets if you buy the wrong year. The Japanese were constantly tweeking the engines on these old bikes).
While I waited for my gaskets to come in the mail from Tiawan or wherever it was these things came from, I brought the engine into the basement and cracked it open. If you can have a friend help you with the first part, you have less of a chance of dying, but if you think you're man enough to carry 200 lbs of aluminum and iron down a staircase, go for it. I did.
Once the motor was opened I was remarkably surprised. Twas remarkably clean for it's age and exterior condition.
Fig. 5: The tappets and cams looked alright to Demoto from the outset, but that only went on to show how incredibly little he knew about motorbikes.
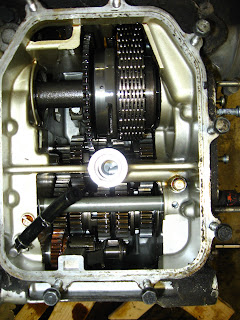
Fig. 6: The Clutch was in pristine condition for her age.
Fig. 7: This was Demoto's first encounter with a shifter mechanism, and it scared him.
Fig. 8: It appeared all gears were presant and accounted for in the transmission...
Fig. 9: The ignition points left some things to be desired, like a new set of points
Fig. 10: As could be expected, the primary gear was a filthy mess. You might notice the bare shaft where the stator rotor used to be (it's just above the stator armature lying on the ground). Expect to need a puller to get that off. I puller is a useful thing for any shop, but unless you're running a factory, you're only going to use it once in a blue moon. Spend accordingly.
Fig. 11: In case you have no idea what a puller is.
...But ripping things to bits is the easy part. One must remember how to put it back together.
...But ripping things to bits is the easy part. One must remember how to put it back together.


No comments:
Post a Comment