
I had a bout of builder’s block with the Steel Steed, and found myself forced to think and work on other projects in order to clear my mind and, perhaps, build my confidence. I faced challenging days ahead, as the non-existent tail section of the Steed begged to be forged into reality. I felt a lack of skill, and the design I had once clung to was now in the grip of doubt. Was it conducive to the existing style of the bike? Did I have the skill and equipment to make it? Did I even like it?

Fig 1: No, I don't think I do...
Whatever the case, I decided to work on other projects. You’ve seen the watch (previous article, if you care to see it), now for something a bit more motorcyclic.
The Suzuki GS850G (which I have been known to drive and crash) has been running aftermarket 4-into-1 pipes with a Jardine glass pack ever since I cobbled together the cash to buy them. The stock pipes were massive dual megaphones done up in aging chrome. I liked them, but they sounded silly, like a whispering dragon.

Fig 2: A whispering dragon. (fssle bssle fssle)
The 4-into-1’s were loud, and the glass pack muffler was more of a glass pack and not so much of a muffler. I loved it. My wife…tolerated it. Loud pipes only get louder on the passenger seat.
There was one problem: These screamin' new pipes didn’t provide enough back pressure to keep the exhaust gasses from scavenging excessively.
Scavenging? What's the scavenging mean? It means two things. This is one of them:

According some dictionary, scavenging is also: to remove (burned gases) from the cylinder of an internal combustion engine after a working stroke.
I don't know what that means exactly, but in simple ideas (which is the only kind I have) I'll tell you my understanding of scavenging. I might even be wrong, and I'd love for ya'll to tell me if I am.
Here goes: Scavenging (excessive scavenging that is) occurs when unburned fuel (i.e. gasoline vapors) is pulled out of the cylinder, through the exhaust valves and into the pipes. The main reason this happens is due to the velocity of the exiting exhaust gasses. The resulting sound is like the eruption of a small volcano, and if you’ve got really short pipes or an exotically tuned engine, you get a nice plume of fire coming out of your muffler (but if this is happening, I’m betting whole dollars you’re not running a muffler).
There are other factors that act on the scavenging effect too, like valve overlap (having both exhaust and intake valves open at the same time for a short duration of the engine’s cycle). But in my case, the exhaust system seems to be the main culprit.
Scavenging? What's the scavenging mean? It means two things. This is one of them:

Fig 3: Scavenging
According some dictionary, scavenging is also: to remove (burned gases) from the cylinder of an internal combustion engine after a working stroke.
I don't know what that means exactly, but in simple ideas (which is the only kind I have) I'll tell you my understanding of scavenging. I might even be wrong, and I'd love for ya'll to tell me if I am.
Here goes: Scavenging (excessive scavenging that is) occurs when unburned fuel (i.e. gasoline vapors) is pulled out of the cylinder, through the exhaust valves and into the pipes. The main reason this happens is due to the velocity of the exiting exhaust gasses. The resulting sound is like the eruption of a small volcano, and if you’ve got really short pipes or an exotically tuned engine, you get a nice plume of fire coming out of your muffler (but if this is happening, I’m betting whole dollars you’re not running a muffler).
There are other factors that act on the scavenging effect too, like valve overlap (having both exhaust and intake valves open at the same time for a short duration of the engine’s cycle). But in my case, the exhaust system seems to be the main culprit.
Note: If you kids at home want to know if you have scavenging on your bike, have an adult fire up your engine, carefully let it warm, hit the throttle hard, and then let it off suddenly. You will hear a series of pops and bangs if you have scavenging. This is the unburned gas exploding in your pipes (don’t worry, it’s not dangerous, just inefficient)
Some scavenging is good, it pulls the old gasses out and forces fuel in. But too much ruins your fuel economy (important at $4.50 a gallon) and results in loss of power (in most cases, but in my experience there are always exceptions with engines).
What I needed to manage my scavenging issue was restriction, something to hold those gasses back, slow them down.
I turned to the only place we have left to find detailed information on things most folks don’t care about: The Internet.
There’s something known in the Harley community as ‘the washer baffle’. It’s application is for drag pipes and addresses the same issues I have with my Suzuki. There are lots of sites that tell you how it’s done, but here’s the one I found after about five seconds of searching:
I made some modifications to the design, because I’m foolish and think I know better than folks with far more experience than I. The result is as follows:

Fig 4: Ah...I got nothin...sorry guys. Not much witty in this shot.
First things first, I stripped the 4-into-1's off my bike. This is a great time to install some new muffler gaskets if you're getting a lot of popping exhaust noises from the front of your engine. I had VHT coated these with manifold paint a couple years ago. I learned from this experience that VHT manifold paint is pretty useless.

Fig 5: My implements
I started by picking a place to drill my hole for the shaft of the baffle. (By the way folks, if you didn't at least look at the pictures of how this job is done, you're not going to understand much of what I'm about to say). I decided to make my shaft end slotted, so that I could use a wrench and screwdriver to tune the bike while it was running. Also, by cutting the slot parallel with the plane of the washer, I could have a visual indication of what position the baffle was in without being able to see it. Important if you're going to strap a long, dark muffler to your pipes like I do on my Suzuki. I picked a spot about four inches from the end of the pipe, on the bottom, so folks wouldn't bother me asking about the bolt on my muffler. Turns out, the decision to put the hole four inches from the end was a huge mistake, but we'll get back to that.
My plan for the baffle was to have a boss coming off the pipe to bolt against, so I welded a stub of 1/2" carbon steel barstock onto my pipes.
Note: A lot of exhaust pipes are made of alloys; high chrome carbon steel, or stainless steel in some cases. I'm no metallurgist, but I would not recommend dissimilar metal welds on an exhaust pipe. The difference in thermal expansion between the bonded metals alone could be enough to give you trouble. I know that my pipes are carbon steel (because they were cheap, and they rust profusely), so I had no fear welding to it. But a basic rule is to know what you're doing before you start doing it. Stick to that and you should be fine.
I beveled the bottom of the boss, then welded it to the pipes with a really ugly bead. When I was done, it looked like this:
I beveled the bottom of the boss, then welded it to the pipes with a really ugly bead. When I was done, it looked like this:

Fig 6: The Boss
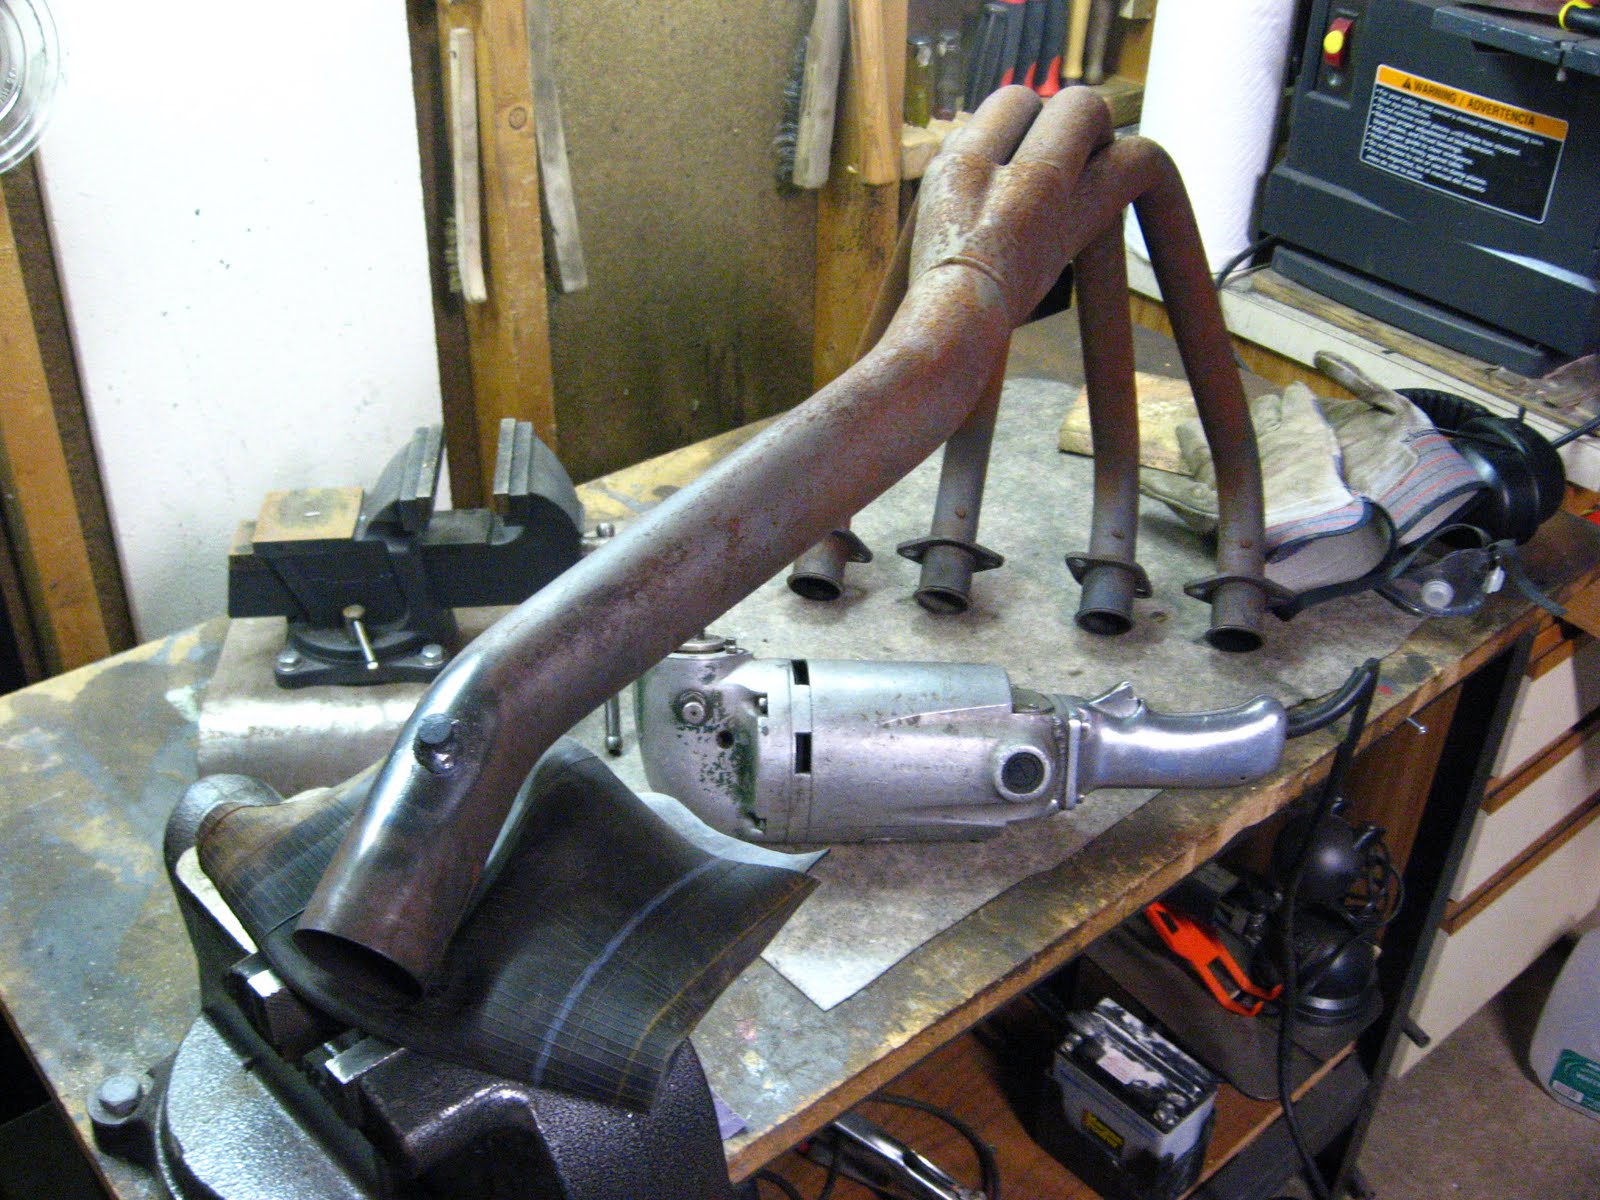
Fig 7: The Boss from a distance
Next, I taped the surrounding metal off with two layers of blue painters tape. I did this to protect the metal while I ground down that weld. The blue tape is really no match for a grinding wheel spinning at thousands of RPM, but it gives you a warning. I usually know when I'm hitting something I don't want to with a grinder, and the tape gives me an extra half a second to pull off when I goof up.
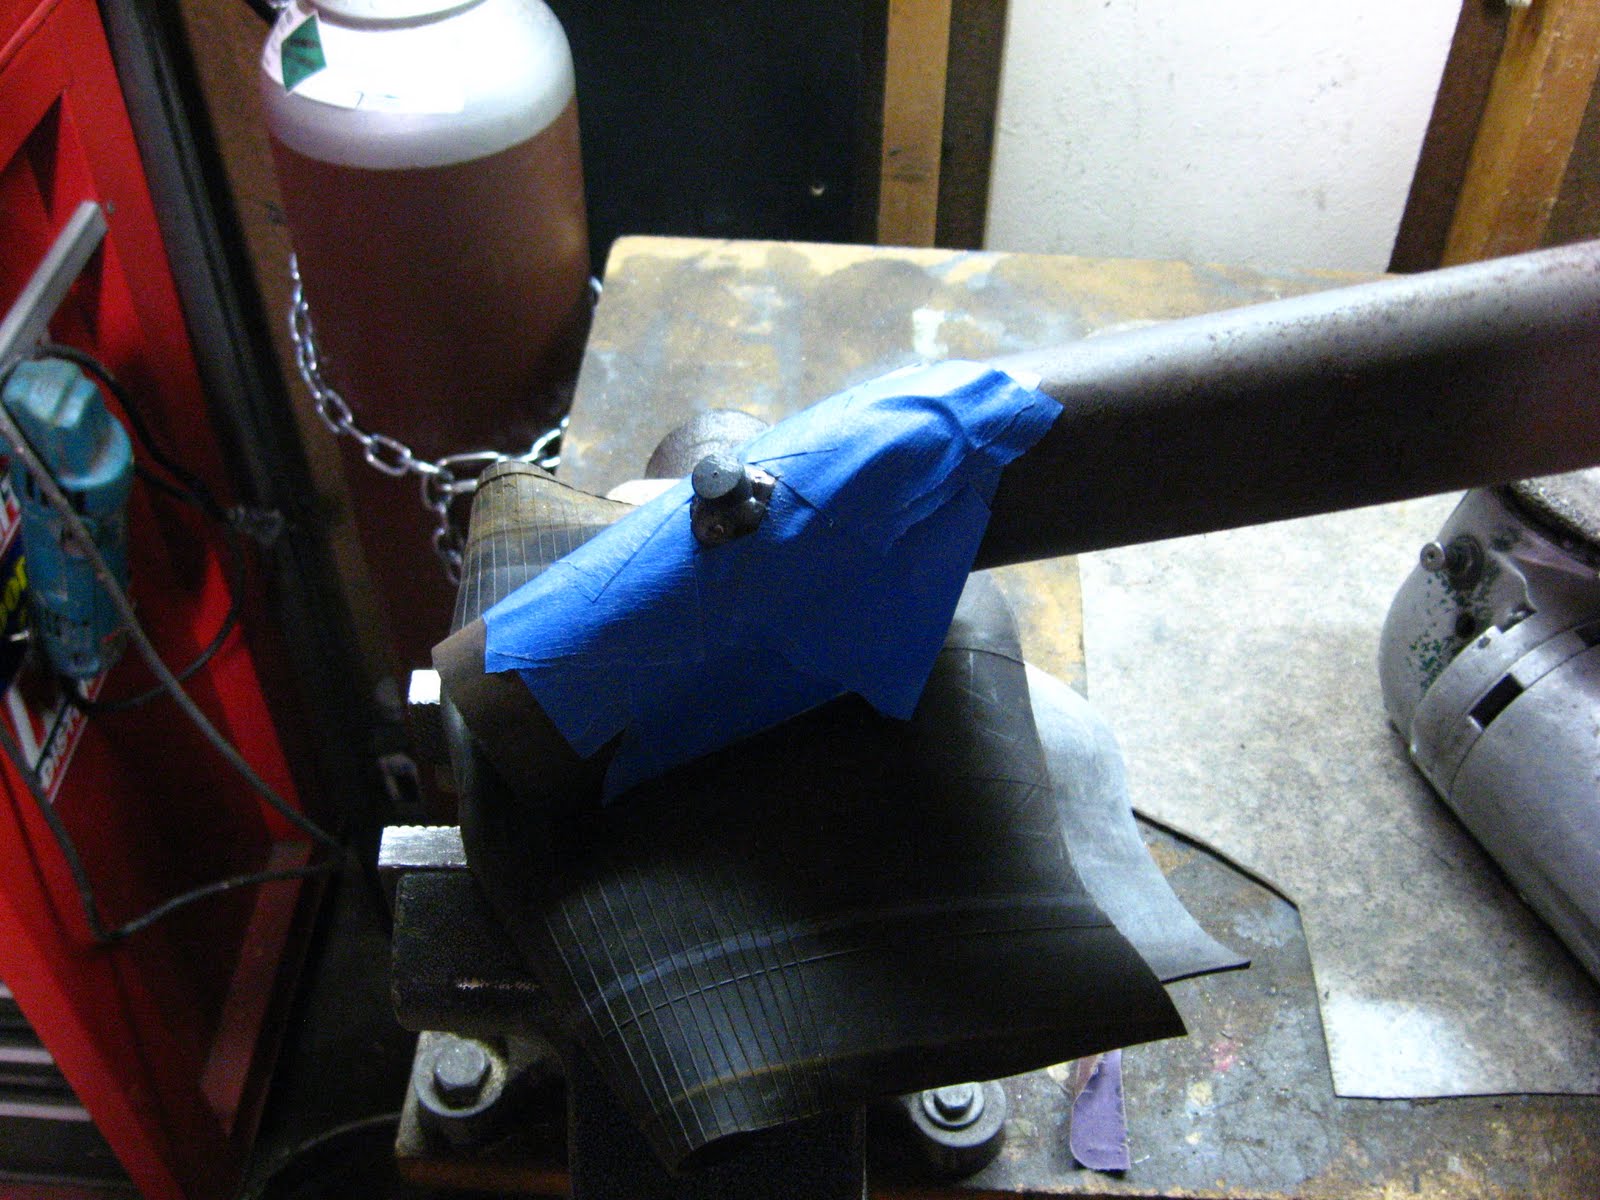
Fig 8: Ready for material removal

Fig 9: An old photo from the vault depicting Demoto grinding metal for a completely unrelated project. It sure does capture the spirit of the moment though.
I don't recall the exact moment, but it was around this time that I began to see the folly of my ways. Having the hole four inches back with a boss meant that putting the washer assembly into the pipe would be...impossible. Basically, I could put the washer and shaft assembly into the pipe, but I couldn't stand it up straight to go through the boss. I was in a pickle. But in clear Demoto form, I pushed ahead with the faulty design and hoped I was going to get smart enough within the next hour to solve it.

Fig 10: The result, courtesy of blue tape, grinders, a file, and a drill bit.
The next bit I got into so much, I forgot to take pictures. Suffice it to say, I took a washer, a smaller washer, and bolt, combined it with a MIG welder, files, a die set, and a makeshift lathe I cobbled together with a cheap power drill, a bench vise, and an angle grinder. The result is displayed proudly below:

Fig 11: Victory
Feast your eyes folks. You won't often see metal this pretty coming out of a shop as shoddy as mine. Hidden as it now is, I am quite proud of this fabbed part. Sadly, I had to shave a bit off the top of the washer in order to get it to fit inside the muffler due to the affore mentioned "four inch setback bungle". It's in the pipe now, probably until Jesus comes back because try as I might, I can't get the thing to come out again.
Sadly for you, I have no picture of the finished article. So I found one on the internet!

Fig 12: Demoto's baffle looks just like this one (coutesy of welderboy1276), except it doesn't look like a filthy metal turd.
I installed a nylon lock nut on the shaft, not an acorn nut as shown above on welderboy1276's noble effort, and I hope the nylon doesn't melt. welderboy1276 doesn't have to worry about his acorn nut melting, because it's made of metal. Also, it's probably laying on the road somewhere, because any bolt on a motorcycle not locked somehow tends to shake free eventually.
My adjustable baffle will now allow me to tune my exhaust pipe to a more tolerable level of scavenging, hopefully allowing me to put still more superbike pretty-boys to shame on the blacktop.
Oh yes, and one more thing. You remember that inspiration I was lacking at the beginning of the article. Well ladies and gentlement, I was standing in my garage a short time after finishing this project when I recieved an epiphany, a revelation, a vision of things to come...

...stay tuned folks.
No comments:
Post a Comment